Sunday, October 21, 2012

A Hacksaw is NOT your Friend

This post is about my icebox.  Yes, an entire post about a little metal box that holds ice and keeps your vegetables cool.  Who’d thunk that such a small and unassuming thing such as an icebox would give me such trouble?

Well, it did.


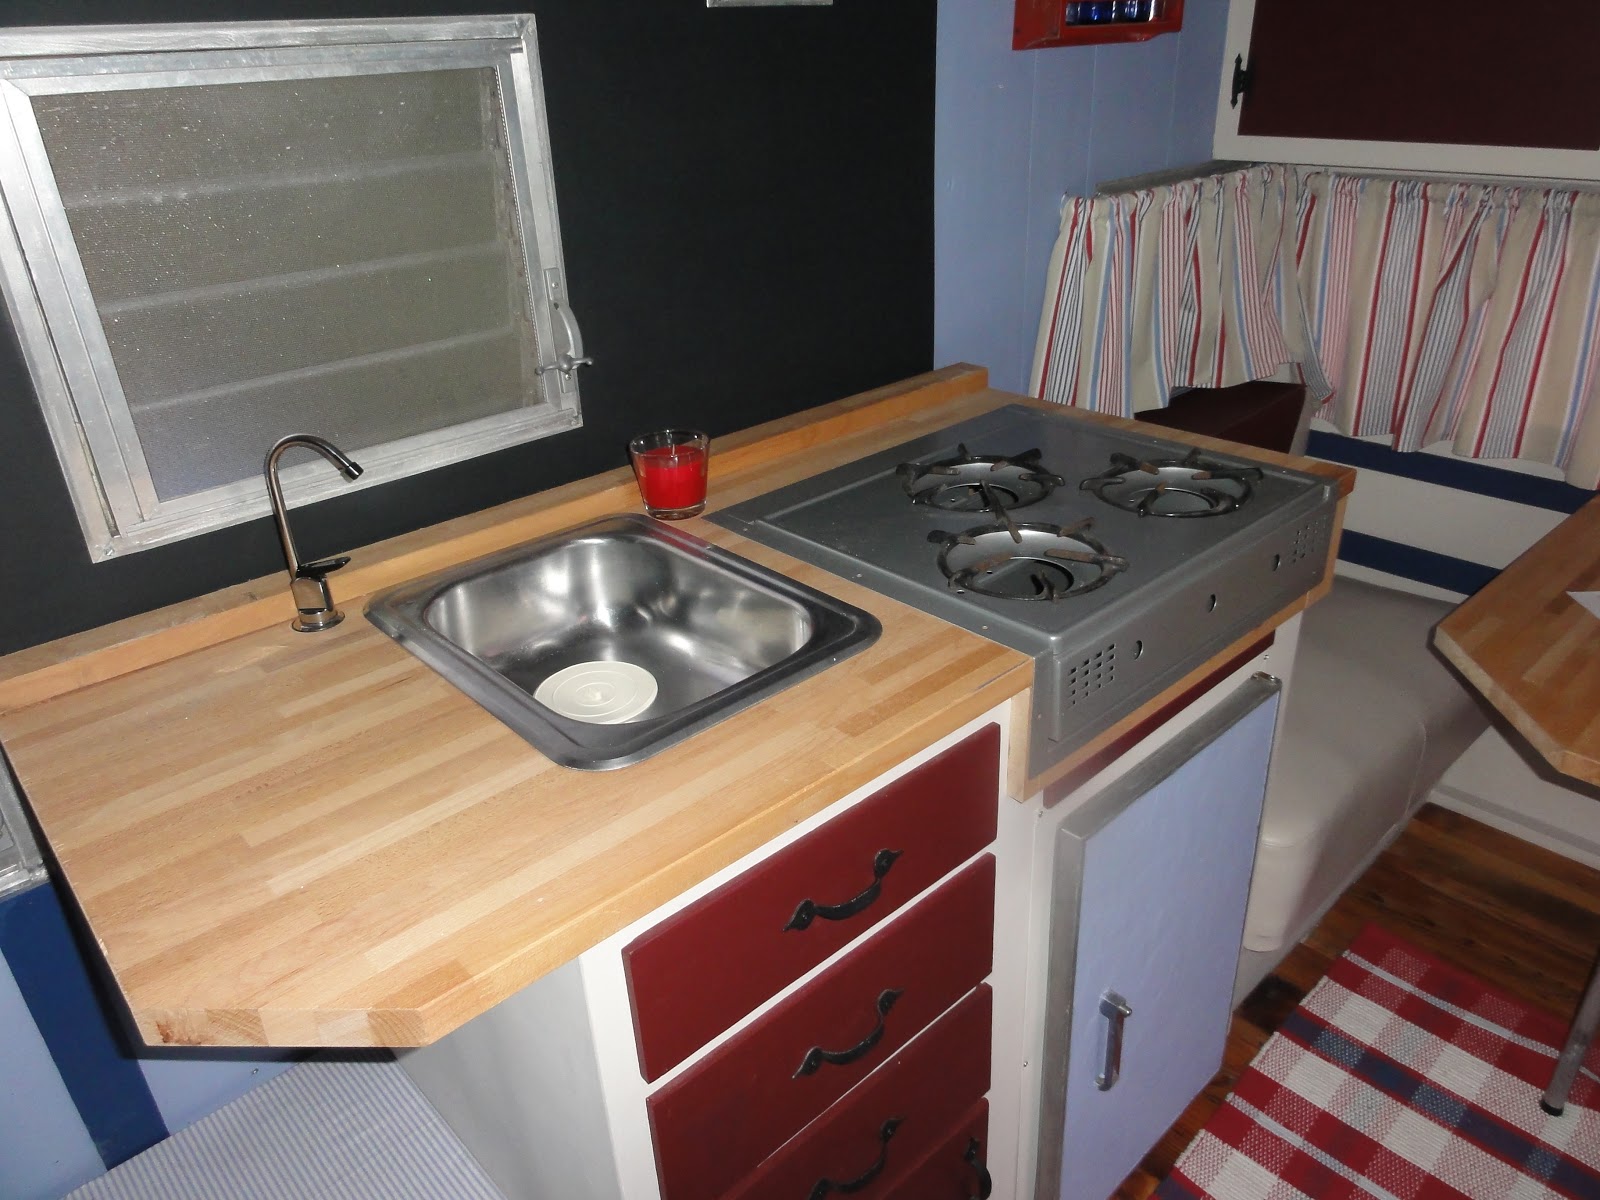
First, I’d like to start off with a big “What were they thinking???!!”  The icebox was screwed into the lower cabinet with 12, count them, 12 screws on the hinge side.  I’m not sure why and can only assume that the “one on each corner” approach just didn’t seem, practical, or enough, or…I don’t know.

“How many screws on the other side?” you may ask.  Two.  Why?  I don’t know. 

Next, I wanted to take the door off so I could paint it or do whatever creative treatment I decided on.  The screws in the door hinge wouldn’t unscrew, they were rusted on.  So, I did what any other semi normal woman would do…I cut them off with a hacksaw.  Oops.  Um…now how do I get the door back on? 
 
Sigh…

The door had a bit of rust on it and I didn’t want to do what everyone else did and just paint it so….I got some dark red, off white, and dark blue scrap book paper and decoupaged the door.  I thought it looked kinda’ cool.  Ok, pretty cool.  Um, maybe cool?
 
My friend who is an interior design student said “It looks like a 4th grade art project went very very wrong.”

Sigh…

Maybe I needed a new icebox? So, I found one on craigslist for $15.  I brought it home and TA DA!!..it didn’t fit and no matter how much I wanted it to…it didn’t fit.

Sigh…

So I painted the icebox door after all.  Painting over the decoupage gave it a fun and unexpected texture.  I like fun.  I like unexpected texture.  Score!  Now back to my original quandary, how do I get the door back on?

I went to a Fastenal store which carries, yep, all kinds of fasteners.  I took the icebox and the door with me.  They were closed but…drum roll…the Do It Hardware Center nearby was OPEN!!  I took it in and handed the box and the door to a very curious but helpful owner / gentleman who spent the next 45 minutes with clamps, and hammers, and going back and forth from the store to the front counter, trying various screws and post thingies, re-attaching the door.

When he was all done he said “That’ll be $2.75” 

Yeah!!

I bought some duct insulation and replaced the rotted cardboard that WAS the icebox's insulation, wiped the inside again with bleach and water and screwed it back into the cabinet.   The 12 screws on the hinge side look pretty weird but I bet you wouldn’t notice if I didn’t tell you. (or ask you to take it out)  Overall it looks pretty great and is a nice focal point for the entry.


The best part of this story is that I sold the other icebox on craigslist for $20!

Nothing to sigh about there….


Friday, October 5, 2012

FREE is a Great Price!

It’s amazing what I’ve learned about myself during the process of renovating my little Scotsman.  I have discovered that I am even more capable than I thought I was.  I’ve conquered my fear of electricity (rewired the interior lights) and found creative and cost effective solutions for many issues; like the countertop, exterior paint, and flooring.

I originally wanted a dark blue countertop because I was using dark blue as my accent / trim color.  So, I tore out the countertop and table top and hauled them in the back of my truck to the local countertop manufacturer.  (No guessing required. Here’s what the measurements are, dude!)

I almost hit the FLOOR when he quoted me $580!!!  Perhaps you have your math wrong?  Nope. Five hundred and eighty big ones.  Um.  Well.  No thanks.

Oh crap.  Now what?
 
The countertop...before demolition.  Icky!
 
As I have mentioned, I love craigslist but even more so (if that’s possible) I LOVE IKEA!  They get a bad rap for having crappy stuff but like any store, if you know what you’re looking for you can get amazing deals and décor items at IKEA.  So, off I went in search of countertop options.  Once again, they did not disappoint.  I found a 9 foot x 28 inch piece of 1” thick butcher block for…drum roll….$59!!!  It was more than enough for the table top and the countertop with cutting boards to spare.  Woo Hoo!!!
 
The NEW Ikea countertop.  Love, love, love it!
 
For the exterior paint I contacted a guy who had recently painted two, fifty three foot long, semi-truck trailers for me.  (I am a purchasing professional so I know how to find people, and stuff!)  One of my friends provides all her basic needs merely by bartering.  Seriously, she barters for everything she needs! 

Ok, where am I going with this?

So I asked Kevin the paint guy, “I’m not sure how to ask this because I’ve never done it before but…would you be willing to paint my vintage trailer for barter?”

He asked me a few questions about what I could offer him in trade, we came to an agreement and I’m happy to say that my exterior paint job was FREE.  (if you don’t count the labor hours I owe him.)  I had gotten two other bids from auto painters and they wanted $1000 - $1200 so FREE was a gift from Karma, or God, or whatever higher power you believe in.  He painted my trailer the same factory color as my convertible V6 that I’ll be towing her with.  They’re a matched set!


Before Paint....


After Paint.... 
I also know a guy (OK, by now I bet you’re thinking “this chick knows everyone!” and you wouldn’t be too far off…) that does amazing interior remodel work with reclaimed barn wood.  So I called him up and he said I could bring my truck and get as much reclaimed barn wood as I wanted for…you guessed it….FREE!

Of course, the wood was wet with rusted nails but I had a vision and I would not let a little wood working project get in my way of jaw dropping floors.

Enter, once again, Mark to the rescue!

He loaned me his planer, I borrowed a table saw from the neighbor, and I bought a miter saw on craiglist for $15; and went to work.  I ran all the boards through the planer to get them all the same thickness (well, almost….close enough?) and then cut them to length and dry fit them in the space.  Mark generously donated a weekend to run them through the table saw and then meticulously installed them.  I sanded the floor and put two coats (so far) of polyurethane down.

I’m telling ya’….these are the most beautiful floors you have ever seen and I’m so glad I didn’t go with VCT because reclaimed barn wood is durable and I don’t care if they get scratched or dirty.  The worse the floor gets, the better it looks.  I know it’s way different than every other trailer out there and really, isn’t that the point?


And the floor was almost FREE!


Tuesday, October 2, 2012

Thank you, Grandma!

So, to review, I got a “free” trailer from my boyfriend.  I’ve spent money on new walls and sealed seams, upholstery, and new tire and wheels. 

At this point I’m telling myself…”I really, really, need a budget.”

So I created a spreadsheet with all the various projects and listed approximate amount of money, for each, that would need to be spent.  I also checked online to determine what the trailer’s approximate value would be when I was done.  (there is NOTHING worse than spending oodles of money on a project that ain’t worth nothin’ when you’re done.)

A doable Budget?  Check.


The kitchen drawers, after they were sanded.

Something worth noting, at this point, is that I am NOT made of money.  I work hard to put food on the table for my two kids and struggle from one payday to the next.   (Oh, and I don’t have credit cards.  They’re super evil.) So, how could I justify spending so much on a side project? 

Early in the project my grandmother died and, quite unexpectedly, left me a small bit of money.  What she left me was just enough to pay a few bills, take the kids clothes shopping, and set aside some for trailer completion.  The money, however, didn’t change my overall idea about saving as much money as I could by doing most of the work myself, it just made the project actually doable.  Frankly, if I didn’t have that money, the trailer project would have sat for much longer than the year it took me to get her done.

So, with the big projects behind me
it was time to get started on the actual work of the renovation.

The kitchen, before demolition.

It all started with paint, or more accurately, primer.  I had some left over from another project so I started by sanding every surface inside and then proceeded to prime them all.  Ceiling, walls, cupboard doors, every…flat…surface.  I think it took me a couple of weeks’ worth of free time and over a gallon of primer.  Between coats (there were two coats of primer applied) I sanded.  Yeah.  It was a dusty mess but I knew that if I didn’t prime first the paint would peel, or not stick, or just look nasty against the 1950’s pinkish (painted on) gross mess that was already there. 

Sand.  Prime. Sand. Prime. Sand.

Now....it's ready for paint. 


First coat of primer, in the dining area.

At this point everyone thought I was nuts and they almost convinced me too.  It was ugly inside and out.  Windows, a door, and walls with primer.  The rest of the parts and pieces sat, scattered, all over my house and garage.

This was gonna’ take some time, tenacity, creativity (there’s that word again) and patience…lots and lots of patience.